48 oz. applesauce
24 oz. cinnamon
1/3 cup white glue
I love this dough because it's so easy to work with. (You can read through her blog post for more information). I used a mason jar lid that was 3-1/2 inches in diameter to cut the circles, and I had plenty of dough for all of my students. Below are my steps for making the owls. You can also refer to this post to see the original directions.
Here are the steps I followed:
1. After thoroughly mixing and kneading the dough, I rolled it out and sprinkled some cinnamon onto the waxed paper to keep the dough from sticking. Next, I cut the circles using a Mason jar lid. I also used biscuit cutters to make different sizes with the leftover dough.
2. I had my students come to the table, six at a time, to work on the ornaments. Each of them had a circle of dough and a piece of waxed paper to work on. I had the students add indentations for feathers with the cap of a Crayola Marker by pushing into the dough at a slant.
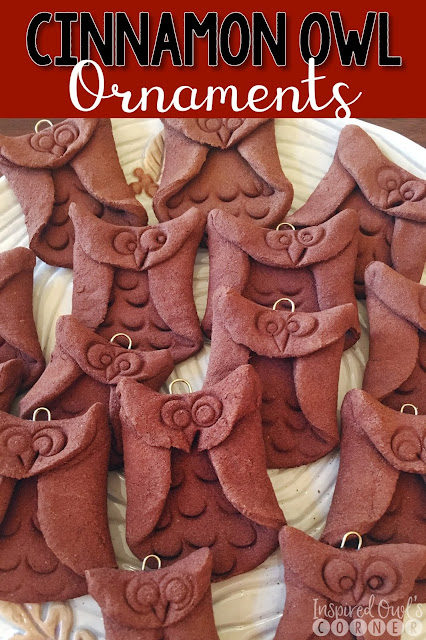
3. We folded the left side over to make a wing. We did the same to the other side to make the wing on the right side, then we folded the head down.
4. We added eyes with the end of the Crayola Marker, and for the inside of the eyes, we used the end of the skinny Crayola Marker. (I didn't have one of the skinny markers at home when I snapped these pictures, so I used a straw, and I actually like how those came out too!) You can experiment with different sizes of markers, pens, or anything else that would make a circle for the eyes. I showed my students how they could make different sized eyes and change the look of their owls based on the placement of the pupils. I gave the students plastic knives to make the v-shape for the beak, but here I used a steak knife. Some of my students wanted to add extra details to their owls, and I told them to go for it!
5. I broke small paper clips in half by bending them back and forth to use as hooks and stuck them into the tops of the owls before putting them in the oven to dry.
6. You can bake them for 2-3 hours at 200 degrees, or you can leave them out to dry on a drying rack for 3-4 days, flipping over once per day. I like to leave them out for a few days in addition to baking them, before wrapping them.
Something else I always do after the ornaments are dry is secure the hooks with a drop of glue, since they tend to slip out. This glue really keeps them adhered. I just pull out the hook, put a drop of the glue onto the top of each hole, and push the hook back into the holes so the glue spreads down into the hole. It's also great to use if you want to make the owls into magnets instead of ornaments. Just add some of the glue to the backside of a magnet, adhere to the ornament, and you've got an owl magnet instead of an ornament!
Be sure to let them dry thoroughly before adding ribbon and packaging them up.
Here are our finished ornaments. Just add festive ribbon or ornament hooks and you are all set!
If you make these ornaments, I'm sure you will love the results. Have a great week! I have a short week, then I will be on a two day shopping frenzy to finish up Christmas! :)
Pin This Post to Save and Share


No comments