Hello friends! Today I have a fun descriptive writing idea and freebie that you can use any time of year, but I love to present it before or right after Halloween, since it involves candy!
Whenever I add candy or food to a lesson, it's sure to be a hit! Students love it, and it is an immediate hook. I have found that students'  learning and participation increases every time I add food. (I guess I'm the same way at staff meetings when they offer candy or food!) 
For this lesson, you will need one candy for each student. I like using Hershey's Kisses. I always have a few students who don't like chocolate, so I tell them that they don't have to eat the chocolate, but they do have to participate in the lesson the class is doing. At the end I give them a different kind of candy, and if they want to go through the entire process with that candy, they can write about it instead. 
I pass out the organizer below and one Hershey's Kiss to each student. I warn them to only look at their candy, they can't touch it yet!
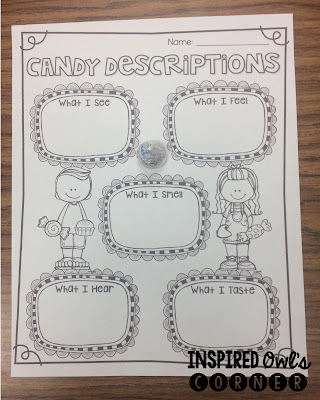
Together we go through each of our senses and describe what the Hershey's Kiss looks, feels, smells, sounds (the sound it makes when you unwrap it close to your ear- it's surprisingly loud) and tastes like. By this time, the anticipation to eat it drives them crazy! I write their responses on my graphic organizer using the document camera, and my students write the responses on their copies. 
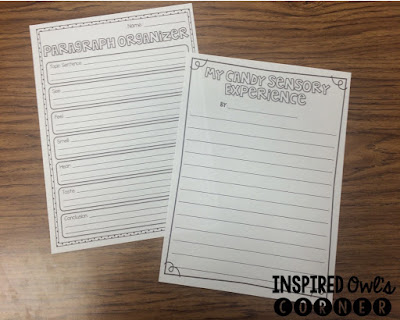
Next, students create sentences for each description, then they write a descriptive paragraph detailing their candy sensory experience. I teach transition words and we discuss adjectives during this lesson as well. 
There are other ideas for comparing and contrasting two different candies and opinion writing in this pack. 
I know my students will love this lesson, and I look forward to getting some great descriptive paragraphs to read. You can find this freebie pack with complete directions hereEventually it will be part of a larger pack that you can use with any chocolate themed chapter book. 
I would love to hear your students' reactions to this lesson!

Today I'm joining my friend Laura from Where the Magic Happens for a BOGO sale in my TpT store! To receive your free item simply:
1. Buy any item from my store.
2. Email me at theinspiredowl@gmail.com with the item you bought and your TpT username. Tell me the item you want for free (it must be of equal or lesser value than the one you purchased.)
3. I will email you your freebie ASAP!


I'm coming upon the eve of the last day of my Fall break! I am ready to go back to school though. It's been a nice break, but I think everyone in my family is ready to be back on a normal schedule! I'm linking up with the fabulous Tara from 4th Grade Frolics for Monday Made It, even though I'm almost a week late to the party! 
I wanted to share a freebie with you that I plan to begin at my school new school next week. 
Every year I start the "Booing" Halloween tradition at my school. I begin by "booing" my class with a bag of treats. You can put anything you like in the bag, but I just add candy. For the past two years I've had students who couldn't celebrate Halloween in my classroom, so instead of "Booing" them, I "Whooed" them with a bag full of candy in an owl bag. I had my administrator leave the bag of candy by the door, and inside were directions, a teacher check-off list, and enough copies of the "We've Been Whooed" printables for the teachers who were participating to tape to their windows so everyone knew they had already been "Whooed". The class was so excited! Everyone got a piece of candy, then we refilled what we took. Next, we decided which class we should "Whoo" next, and I had a few students sneak the bag down to that classroom. It was so much fun seeing all of the cute signs in the windows!
I found the "boo" bag below at Target, so I might use it instead of the owl bag and "Boo" instead of "Whoo" my class this year! It was in the Dollar Spot, but it cost $3. It's felt and about a foot and a half tall. It would make a fun gift bag for a colleague too.
To make sure things run smoothly, touch base with the other teachers at your school to make sure they want to participate. Give them enough time to buy a bag or two of candy so they can refill the bag and send it to another classroom after they get it. When I first started doing this, I didn't check in with the teachers to see if they wanted to participate. All it took was one teacher to keep the candy and not send it to on, and our booing fun ended. If you let the teachers who want to participate know ahead of time, they can have candy on hand and not waste a day without sending it to another class on the list. 

Click on the picture below to download your own copy of this file. I have a few different owl and ghost printables so you can decided which you like best. Depending on your neighborhood, you could do this at home too!
I hope this freebie adds some fun to your days leading up to Halloween! This is such an exciting time of year to be a child, and we are lucky enough to help create it for them and relive it through them! 
Have an amazing week! 
I'm so excited for the November Edition of Teacher Deals and Dollar Steals! There are tons of great deals in this linky! 
I've added my Fall Fundamentals CCSS ELA Centers to this linky. It includes six different engaging ELA activities: Singular and Plural Nouns, Common, Proper, and Abstract Nouns, Sentences, Possessive Nouns, Contractions, and Prefixes. I have a complete set in color and black line for your printing preferences. Below are a few of the activities we worked on last week! I was surprised how challenging contractions were for a few of my students. This practice was just what they needed. 
Do you need a quick and easy Thanksgiving gift for volunteers or colleagues? I have a freebie Thanks a Latte card that you can add a Starbucks (or other coffee) gift card to. I also have smaller notecards that you could attach to latte-scented hand soap or lotion. Bath and Body has a wonderful pumpkin latte scent! It's a freebie and you can grab it by clicking on the pictures below!

Be sure to check out the other amazing resources below. (I plan to grab a few myself!) 
Have a great rest of your week. My fall break is almost over, but I shouldn't complain, because I was lucky enough to get one! 

This has been a whirlwind of a year! There have been a lot of changes in my district, but I finally feel like I'm getting a handle on second grade curriculum, my schedule, and balancing it all along with family life. We are getting ready for the end of first trimester and testing, and I'm reviewing concepts using thematic centers and workstations.  


This year my team and I have decided to do more thematic teaching than we have in the past. A colleague attended a science workshop that encouraged teachers to teach thematically. (Of course when I heard that, it reminded me of how I used to teach two decades ago when I first started!) I was very excited to hear her say that! I love that we can integrate reading, writing, math, science, and social studies into our day without feeling like we "can't do it all". The students are so much more engaged when we teach in a meaningful way that is relevant to them. 

I have struggled with organizing my centers/workstations for years. There are so many task cards, recording sheets, and answer keys to keep track of! I have tried gallon-sized Zip-Lock bags, large envelopes, and 12 x 12 plastic bins used for scrapbook paper and supplies. You name it, I have probably tried it! Nothing seemed to work well, until I found a system last year for organizing and storing these files. I buy the file folders with pockets and 5x7 envelopes from Staples to store my files.  


The pockets are great for storing everything. I have tried folders without the pockets and paper clips, but the contents easily fell out. With these folders with pockets, everything for the center is contained in the file folder- this is so easy to store and organize! I keep the cards in the envelope so they don't end up with the wrong center. 


I print a copy of the cover for the center on the front to easily find what I need. 


Below you can see how much can be stored in one file folder. (This is actually a freebie in my store- click on the picture below to download it.) 


I store all of my center files in the magazine holders below. (I bought these at Big Lots last summer.) These are labeled by season and sit on my shelf so they are readily accessible. 


My kiddos go absolutely crazy if I add a cute themed felt bag or pail to my centers and work stations! Sometimes I have them draw from the baskets, and other times I have them use the baskets to sort their cards, depending on the activity they are engaging in. You can keep task cards in mini gift bags from the Dollar Store so students can grab them and go to their seats. I have found that adding this little bit of novelty helps to increase students' engagement and buy in. 
 

I oftentimes will sleeve the recording sheets in clear folders or page protectors to help conserve paper. I give the students a dry erase marker and a cloth, and students are ready to go. 


Having all of the centers ready to go ahead of time in baskets makes it so much easier to pass out to groups! I bought the baskets below at Target's Dollar Spot, and spray painted them with paint made for plastic. (See how I spray painted them here.)


How do you organize your centers? 

Hello Friends!
If you haven't checked out Pawsitively Teaching's Pawsitive Planner, you have to! She shares ideas, books, and videos to make your thematic planning for October effortless. (She's a genius!) This has helped me so much, as I have been teaching thematically this year. 
Check out the links to the different editions of her Pawsitive Planner for October below by clicking on each picture! She has several others from previous months, so be sure to check those out. This post has some great ideas and freebies for October too!

I'd love to away one of my Fall Fundamentals packs! It's perfect for practicing ELA concepts for 2/3 this time of year! Just leave a comment on Pawsitively Teaching's blog after visiting her latest post, and come back here and leave your email, and I will choose a winner this weekend! 
Have a great rest of the week! Next week is my Fall Break- yippee! 
Welcome to the October edition of Pick 3 Pinterest Party! I'm so glad you stopped by, and I hope you find lots of inspiration from the wonderful bloggers who have joined PAWSitively Teaching and me. I LOVE this time of year and everything fall, pumpkin, and Halloween inspired. I can't wait to see what everyone shares!
Click on the picture above to see the original pin.
I seriously LOVE Lisa's PAWSitive Planner blogposts! She includes her amazing resources, book suggestions, and links to videos. This is perfect for busy teachers like me! I can teach thematically and my unit is planned for me thanks to her generosity! I appreciate the time she saves me. Check out her Christopher Columbus post here! I heard her pumpkin planner will be coming next! My students will love this October Reading Passages pack mentioned in the Pawsitive Planner, and I will be set for the month!
Click on the picture above to see the original pin.
This Venn diagram is such a neat idea! We studied apples last week, and we begin our pumpkin study in a few weeks. I can't wait to have the kiddos compare and contrast apples and pumpkins to demonstrate their learning. I have an amazingly artistic colleague, so I'm going to hit her up to draw this for me! 
Click on the picture above to see the original pin.
I have done the dancing raisins experiment with raisins, baking soda, and vinegar, but this one was new to me. Chemical reactions are always a hit with my students, and this one will be perfect for the day before Halloween!
Visit Marissa's profile on Pinterest.
Now it's your turn! We would love for you to link up and share your top three Pinterest finds for September! This linky is hosted on the third of each month- so come join in on the fun!
 
1.  Save the Pick 3 images to your desktop.
2.  Create a blog post using these images to share you 3 Pinterest Picks for the month.
3.  Share a link to your full Pinterest page if you would like.
4.  Link up by clicking the "add your link" button below.
5.  Be sure to check out the other Pinterest finds that have been shared and leave a comments on the ones you love!


Back to Top